I’m asked a decent amount on social media, ‘How can I take better travel photos?” So, I figured I’d put some pen to paper (figuratively) and write a bit about the tips that have helped me take travel photos on multiple continents and land paid photography gigs.
These are going to sound pretty simple – and I somewhat believe that they are. In the end, though, taking photos, trying new things, and improving over time is the number one way to take better travel photos.
There’s no golden ticket. Once you put in the work, the results will show up over time.
How to take better travel photos on your next trip
1. Get Up Early, Stay out Late, and Get the Golden Light and Fewer Crowds
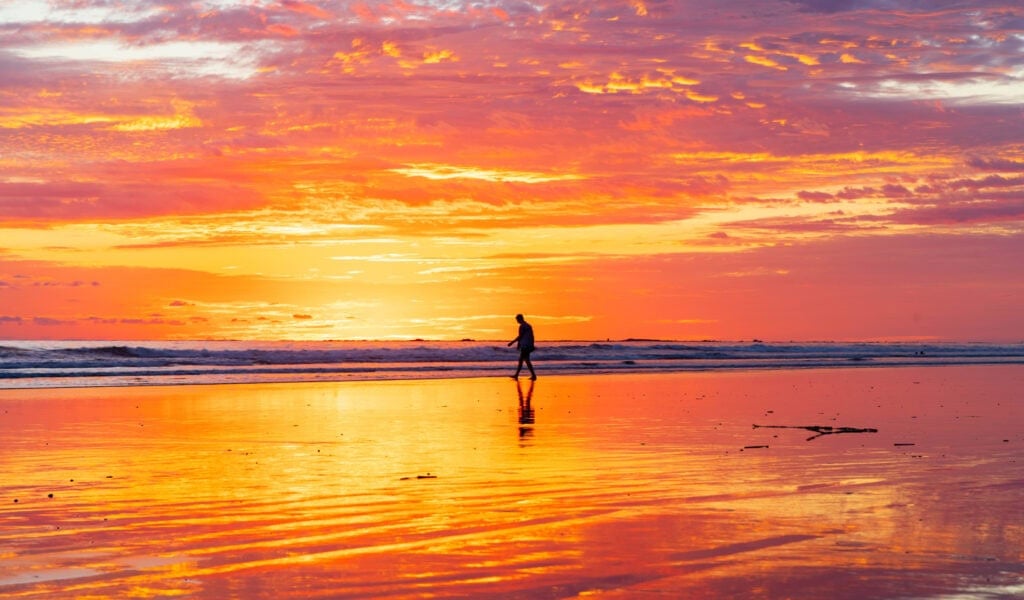
I hate to break it to you, but sunrise and sunset are the best times to photograph and create magical travel photos. It’s not the only time (embrace daytime photos), but getting soft light and beautiful sky colors means being out early or late will make your images pop.
This is actually the easiest one on the list. You just have to be okay with not sleeping or eating at normal times!
Another reason to get there early/stay later is that the crowds tend to be negligible – especially for sunrise. If you don’t want to remove a bunch of people from your photos during editing, showing up at a popular place before sunrise will let you capture it more naturally.
2. Use Humans to Show Scale
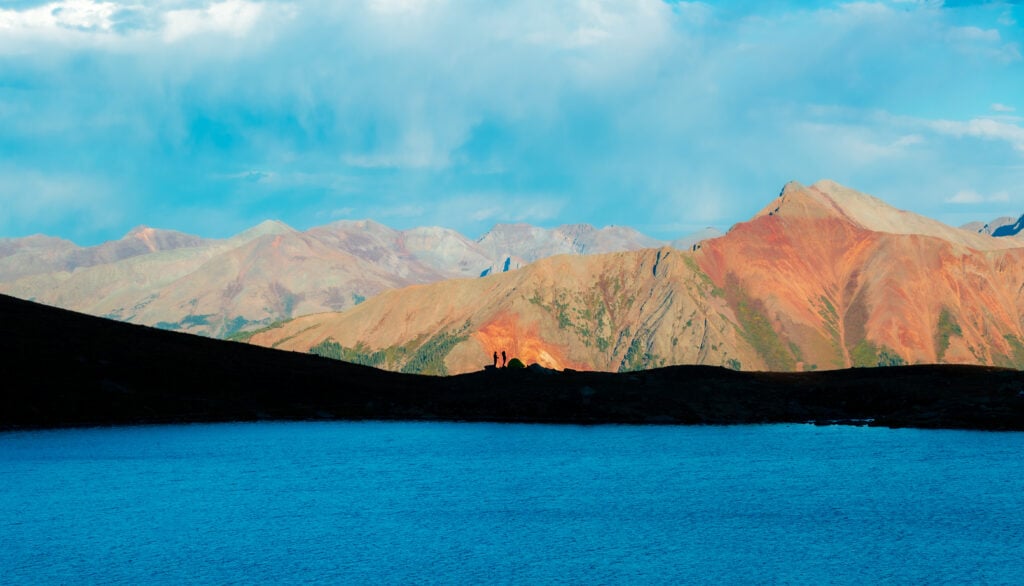
Scale is one of the best ways to give the viewer a sense of what they are actually looking at. You can take a photo of Half Dome, but when you put a climber on the face, looking so tiny, with the Yosemite Valley floor 2,000 feet below, you get a true wow factor.
It doesn’t have to be a bit mountain scene or a human either. Using wide-angle lenses or other objects gives humans an idea of how big or small something is.
3. Look for Unique Details

When you travel, you’re exposed to so many unique and interesting things and places. A cool way to show off a place is to find unique details in the landscape, in the sky/on the ground, or in woven fabric, for example.
The world is your oyster. You just have to find the pearls in it.
4. Crouch or elevate to change your photo angle

Another one of my favorite tips to take better travel photos is to change your perspective. Most people stand upright and take a photo. Do better.
Get low and shoot up, or get high and shoot down. Anything outside of the ordinary will make your photos stand out.
This is far more valuable when taking wildlife photos, I believe, because it shows the animals in a powerful position.
5. Blur Your Foreground or Create a Frame
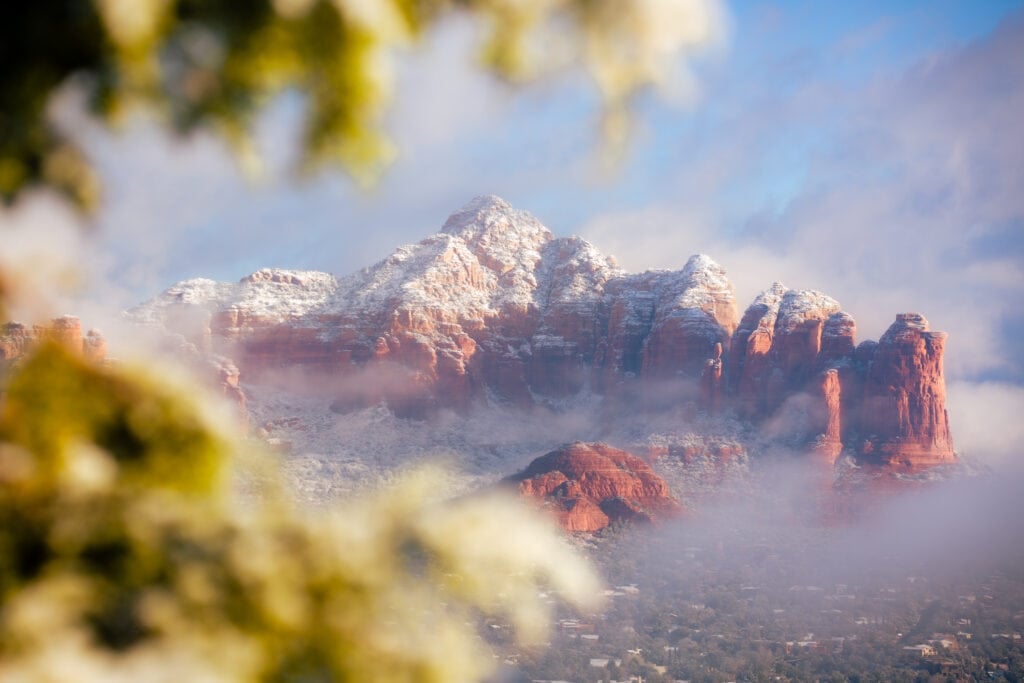
A beautiful way to take travel photos is to blur your foreground and use it to frame whatever you want the viewer’s eye to focus on farther away. It creates a sort of window element where they are looking through something to see the main attraction.
It makes the viewer feel like they are there with you and really focuses the eye. This shot from Sedona is one of my favorite ‘framers.
6. Go somewhere beautiful

Hate to break it to you, but going somewhere pretty is really the best way to take great travel photos. Sure, every place has its own uniqueness, but taking travel photos in Phoenix, AZ, vs. Banff National Park is like night and day.
Most of an audience’s view of an image is shaped by the beauty of the landscape, not by how you took a unique shot. If you’re starting out, spend more on visiting visually appealing places than on buying new gear.
7. Understand your camera and tech settings
Understanding your camera’s settings and how to take different types of photos will dramatically increase the quality of your pictures. High-level examples are knowing how to slow down your shutter speed for long exposures on waterfalls or the night sky.
Or knowing how to bracket photos so when you edit them later, you can merge them into an HDR for a more complete image.
8. Be Authentic

This slightly contradicts the first item on this list. But sometimes, you want to show a place with people in it. It doesn’t have to be completely overcrowded, but showing people acting normally in a setting is a nice way to be authentic to a location.
This is especially true for people trying to better understand what they will be experiencing when they visit.
9. Keep Shooting

You can do everything above, but if you don’t keep shooting and practicing, your photo skills won’t improve. The VERY BEST thing I can recommend is to take your camera with you everywhere and photograph everything.
Try weird compositions. Try weird settings. Learn what works and what doesn’t. Over time, you’ll figure out what you enjoy doing and what clicks for you. And when that happens, your travel photos will take off and flourish!
Traveling with your Camera Gear
Never Let it Out of Your Sight
Car or plane, never let your camera gear out of sight. And never check your camera bag for a flight. Do everything possible to keep that with you on the airplane. I’ve heard too many horror stories of people who have to check a bag due to a crowded flight, and then they find their bag was tossed around and lenses or bodies were dented/broken.
Your Bag will be Heavy
If you’re carrying all your gear, your bag will be heavy. And it’s just something to deal with. I’ve been able to fit two camera bodies, a 100-500, a 24-70, and a 70-200 into my Wandrd bag for Alaska in 2024. And then I had to carry the 400mm lens as a carry-on as well.
That was heavy, but you do what you have to do.
Gear I count on when traveling:
-
- Canon R5
-
- Canon 24-105 (great versatile lens)
This article originally appeared on Explorewithalec.com